3 Days of Networking Troubleshooting – Day 3: Polling and configuring WiFi from the command line
Having Linux’s hardware detection software configure your network devices, including your WiFi, is the usual thing. But you may come across a botched configuration from time to time. When that happens, you need to be ready.
Conventions used in this guide
Throughout our command line tutorials, we use $ to indicate you can run the command shown as a regular user, and # to indicate you must run the instruction as superuser/root or using sudo.
When we show both the instruction and its output, what you have to actually type is shown in bold.
In the early days of Linux, say, oh, 10 years ago ;-), the opposite was true: configuring a network by hand was the norm. And configuring a WiFi by hand was a privilege! At least it meant your hardware worked.
But before we get down and dirty with the command line, you should first take a look at the first and second part of this series, just in case the problems you have with your connection lay elsewhere.
In the first part of this series you saw how to troubleshoot your hardware and restart the network subsystem on your computer to get your network connectivity working.
In the second part, once you were sure the problem was not from unsupported hardware, missing drivers and failing network subsystems, you tackled setting up a wired connection by hand, from IP, to route, and, finally, DNS.
Which is all well and good for wired connections, but what if WiFi is all you’ve got? This is quite common in modern ultrabooks which cannot accommodate much more than the skinniest of USB slots and a headphone jack. Often there’s no space for an RJ45 port. All that sleek comes at a price.
Take heart, though, because getting connected to your network from a wireless interface is more or less the same as from wired interface, except there are a couple more steps on the way.
Blocks
Let’s start from a premise similar to what we saw in part 2 and assume your WiFi, wlan0, is your only interface, and it is down for whatever reason:
$ ip addr show dev wlan0
3: wlan0: <BROADCAST,MULTICAST> mtu 1500 qdisc noop state DOWN group default qlen 1000
   link/ether 74:e5:0b:96:33:62 brd ff:ff:ff:ff:ff:ff
Before we bring wlan0 up, you have to check and see if it is blocked. A wireless card is often blocked for security reasons. This makes sense if you think about it, after all, you don’t want people trying to access your laptop while you’re out and about. Manufacturers include sliding switches or key combos that allow you to close down or power up you machine’s WiFi hardware.
There are two types of blocks to look out for: hardware blocks, that come in the shape of switches, usually located on the side of your laptop (check it now. It should be in the “on” position), or software blocks, that require you press a combination of keys to activate or deactivate WiFi. The rfkill command will tell you what blocks are in place and most of the time will allow you to override software blocks. As for hardware, again: check those sneaky switches, will ya?
Try
# rfkill list
0: asus-wlan: Wireless LAN
       Soft blocked: yes
       Hard blocked: no
1: phy0: Wireless LAN
       Soft blocked: yes
       Hard blocked: yes
For some reason, rfkill is seeing two interfaces on my laptop, when really there is only one. But, whatever: You can see from the output that the wireless interface is blocked on both.
Let’s go ahead and unblock everything:
# rfkill unblock 0
# rfkill unlock 1
Check rfkill list again to see how things are now:
# rfkill list
0: asus-wlan: Wireless LAN
       Soft blocked: no
       Hard blocked: no
1: phy0: Wireless LAN
       Soft blocked: no
       Hard blocked: no
You can now bring up the WiFi interface with
# ip link set dev wlan0 up
You’re doing this first (and not setting the IP first, as we did in part 2) because you need wlan0 up to be able to scan available WiFi networks.
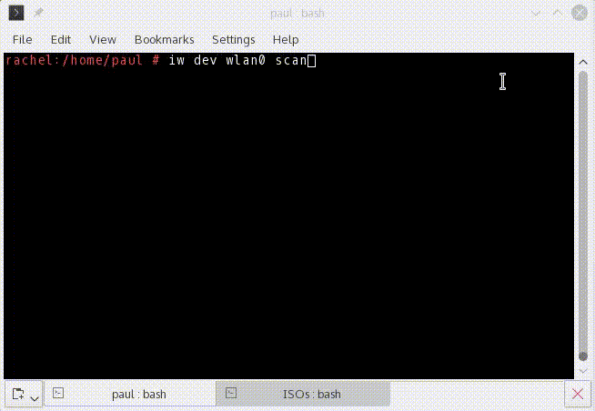
You scan for networks with
# iw dev wlan0 scan
The output from this instruction is very verbose indeed. You’ll probably need to scroll up and down to find the name (SSID) of the network you have to connect to. Note that, unless you’re in the middle of the Sahara desert, you’ll probably pick up more than one. If you can’t see yours, you may be out of range — another reason for not being able to connect to the net.
SSID and Password
Armed with the name of the network and the password, you are now in position to log on. To do this, create a simple text file (you can do it as a regular user) and save it somewhere in your user’s directory. I called mine wpa_config_file. Open the file with your text editor and write in the following information:
network={
  ssid="your_network's_ssid_name"
  psk="your_password"
}
Where your_network’s_ssid_name is… well, your network’s SSID name, and your_password is the password you use to access it.
Save the file and exit. You will now use this file to log onto the network using the wpa_supplicant tool:
# wpa_supplicant -B -iwlan0 -cwpa_config_file
Successfully initialized wpa_supplicant
The -B option tells the app to run in the background, the -i option tells wpa_supplicant what interface to use (wlan0), and -c flag tells the app which file it has to look into to get the SSID and password.
All of the Rest
At this point, you can try running
# dhclient
like you did in part 2. If you’re lucky, and there’s a good chance you will be, the DHCP server on your network will supply you with an IP for your machine and configure the rest of your network. If that happens you’re done. Hurrah!
But, if that doesn’t work, rest assured that from this point onwards, configuration is virtually the same as with the wired connection you saw in part 2.
Assuming your internal network has IPs ranging from 192.168.1.1 to 192.168.1.254, and your router is located at 192.168.1.1, you assign an IP to wlan0 with
# ip addr add 192.168.1.67/24 dev wlan0
Note that 192.168.1.67 is just a random IP I picked from what was free on my network.
You set up a route to external networks with
# ip route add 0/0 via 192.168.1.1 dev wlan0
Remember that we are assuming the router’s IP is 192.168.1.1. Check what yours is.
And, finally, you add DNS servers to /etc/resolv.conf by adding lines like
nameserver 8.8.8.8
to the file.
The 8.8.8.8 IP is one of Google’s DNS servers, but there are plenty of lists of other public DNS servers online, even classified by country and reliability, if you would prefer to use something else.
Once you save the file, you will be able to connect to the network, the Internet and use URLs (“website names”) as well as IP numbers.
As explained in part 2, this configuration is temporary. As soon as your reboot or, indeed, restart the networking system with systemctl, your networking will probably go down again and you’ll loose the settings, because, presumably, the problem is in the configuration somewhere. As different distro have different configuration files and syntaxes they use to configure a permanent connection, check online with your community on how to fix yours.
Checklist
So, to recap, the steps to get your wireless interface working are:
- Check to see if the WiFi interface is blocked and unblock it with
rfkill unblockif it is. - Bring up the WiFi interface with
ip link. - Find available WiFi networks with
iw. - Create a file containing your network’s SSID and password.
- Log on to your WiFi network using
wpa_supplicantand the file you created in step 4. - Assign an IP to your interface with
ip addr. - Set up a route to other networks with
ip route. - Add DNS servers to /etc/resolv.conf.
And we’re done! This three part series, although not the be-all and end-all of Linux net configuration, should get you on the fast track to troubleshooting (and solving!) network problems on your computer.
Part 1 of this tutorial deals with checking your hardware and making sure the modules (drivers) to make it work were available. We also see how to restart the network subsystem in case it has crashed or failed to start.
In part 2 we delve into the intricacies of configuring a makeshift wired connection by hand with and without DHCP, using the new set of GNU/Linux networking tools. Especially useful, when despite doing all of the above, you still can’t get online.
Cover Image: Cellular Tower by Maxwell Fury for Pixabay.com.


I’d recommend using iw instead of iwlist (old deprecated wireless_tools)
Syntax would be
iw dev scan
Yep. Corrected. Thanks Kristoffer.