Script-Fu: Converting PDFs to (pretty) Previews with ImageMagick
Say you publish articles, or books, or pamphlets. Say a lot of your work is tied up in hefty PDFs that don’t look good on the web. You can still showcase your work in an appealing way on your website by using ImageMagick’s seemingly infinite box of tricks.
If you write books or for magazines, or your artwork is featured in a publication, you will often find you are not at liberty to distribute your own work, since the distribution rights will belong to your publisher. However, you can still showcase your work in the shape of a preview. By using ImageMagick you can convert a PDF of your writing or art into an appealing image and display it on your website.
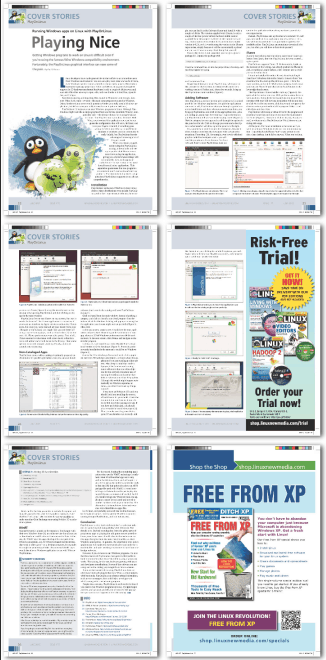
This method is also a good way to present your work using a really light file. I mean, check it out: the original PDF I use in this example weighs over 11 MBs, but the generated JPG you can see under these lines weighs less than 2, and everybody likes fast loading websites, right?

Pretty Pages
To get started, let’s take one of my own articles, a six page PDF, and feed it to ImageMagick’s convert and see what happens:
convert your.pdf yourimage.png
Turns out convert is clever enough to break the PDF into separate images, one image per page. So, the instruction above will give you…
yourimage-0.png
yourimage-1.png
yourimage-2.png
yourimage-3.png
yourimage-4.png
yourimage-5.png
That is, as many images as pages your original document contains.
This is a good first step in the right direction, but look how the first page of the original PDF and the first image generated by convert compare:

You’ll notice two things: (1) the resolution is shot to hell in the image (on the right — the PDF is on the left) and (2) the colours are all wrong.
The former you can solve with the -density option:
convert -density 300 your.pdf yourimage.png
ImageMagick takes 72 dpi as the default density for vector-based images (such as PDFs) when it converts them to bitmaps. This was okay back in the day when screens where 1024×768 or an image on the web could make your 56K modem choke, burst into flames, and die, but nowadays it’s way to low and results in chunky images.
By including the -density option as shown above (i.e., applying it to the PDF you want to convert), you tell convert to take your.pdf as having 300 dpi, which is what is passed on to the PNG images. You can see the big difference this makes below.

Colour me Maroon
Having solved the resolution issue, let’s tackle the colour problem. This is going to be a little trickier, but follow this section carefully and you’ll get there.
The problem with the colours is that, in the converted PNG, they look solarised and are in general ugly and flat. Here, let me show you another example from a different file:

The PDF with nice, realistic, and subtle colours is on the left. On the right is the PNG with colours way out of whack. Check out the differences in blues and greens and how they look garish in the converted picture.
You see, as long as your original PDF document (a) does not contain images, or (b) only contains black and white images, or (c) contains images in the RGB colour space, you’re going to be fine. But, the moment your document is (d), i.e., it contains images in the CMYK colour space, you are heading for trouble.
It turns out PDFs containing images in CMYK colour space are much more common than you may think. CMYK (which stands for Cyan, Magenta, Yellow and blacK) refers to the ink colours used in printing presses. PDF is the default document format in the printing industry. Do the math: it is very likely your PDFs will be rendered in the CMYK colour space, especially if you got them from your publisher.
That said, one way to find out for sure is by using ImageMagick’s identify tool. Use
identify your.pdf
and you’ll get some information about the PDF, but use
identify -verbose your.pdf
and you’ll get a whole bunch more, including the colour space.
But -verbose gives you nearly too much information, plus each page in the PDF is treated as a different image, and gets its own avalanche of information. Hence, if you have 6-page PDF like you do, you’ll get swamped by lines and lines of data. To pick out what you’re really interested in, you may want to use the -format option. The following line:
identify -format "%r\n" your.pdf
will output:
DirectClass CMYK
DirectClass CMYK
DirectClass CMYK
DirectClass CMYK
DirectClass CMYK
DirectClass CMYK
i.e, the colour space for each page contained in your PDF (assuming, of course, the colour space for your PDF is DirectClass CMYK).
Just to clarify, -format allows you to cherry pick the information identify shows, and how to show it. In this case %r lifts out the colour space information, and \n inserts a newline so that each instance for each page gets printed on its own line. There’s a whole list of options you can use with -format on the ImageMagick documentation page.
The problem with the colour is that, although identify can extract the colour space string from the PDFs metadata, ImageMagick doesn’t really know what the colour space is or the exact correspondence of the CMYK colours to the RGB colour space. So, when asked to translate pixel colours from one space to another, it guesses. Or, more precisely, it takes each pixel’s colour value in the original colour space (in this case CMYK) and tries to calculate its equivalent in the target colour space (in this case RGB). The result, as you see above, is often not very good.
To take the element of chance out of colour conversion, you can add a colour profile to the original image using the -profile option. A colour profile is basically used to map the colours in a given image. You can then convert from CMYK to RGB using an RGB profile and colours will look much better because convert can match them better. This is possible because we know how the colours are mapped in each space. Your amended command will look something like this:
convert -density 300 your.pdf -profile [CMYK_profile.icc] -profile [RGB_profile.icc] yourimage.png
What’s happening here is that you are using a CMYK colour profile file you would have previously installed on your computer (more about this in a minute) and you’re swapping out the original profile from your.pdf and giving it a new one. ImageMagick converts your.pdf to this new CMYK profile. Hopefully the new CMYK profile will be similar enough to the original file’s profile to avoid any major colour shifting. Once done, your.pdf has a colour profile ImageMagick can work with.
Next you tell convert you want to change the image’s colour profile again, this time more radically to RGB, another profile contained in a file you will have installed on your computer. As ImageMagick can now look up the colour on the CMYK profile and map better the values in it to those in the RGB profile, when the time comes to actually convert the PDF into a PNG image, the colours come out much nearer to the original. See the examples below.
This is necessary, by the way, because PNG files can only do RGB. If you export to other formats, say, JPEG or TIFF, both of which can support CMYK colour spaces, you may or may not have the same problems.
The first caveat to the method described above is that you will probably have to track down and install colour profiles yourself (they usually have the extension *.icc). Linux distros usually supply some along with applications such as ghostscript, Tex, and other packages. There may also be packages in your distro’s repositories especially dedicated to installing standalone ICC files, often engineered to be compatible with profiles commonly used within the printing industry. Finally, you can go online and search for more colour profile files around the web. In this latter case, you will have to download and copy the files to the right place yourself.
The second caveat is that you might end up finding you have several CMYK and RGB ICC files to choose from. If you can’t find an exact match for whatever identify spits out, the only way to know which one works best is to experiment with different combinations.
My own personal command line actually looks like this:
convert -density 300 your.pdf -profile /usr/share/ghostscript/9.15/iccprofiles/default_cmyk.icc -profile /usr/share/ghostscript/9.15/iccprofiles/default_rgb.icc yourimage.png
That’s because the best match I have found for the PDFs my publisher sends me is the default_cmyk.icc file provided by ghostscript. The default_rgb gives me a nice converted colour for the PNG.
Check out how different the converted PDF looks now. As always, the original PDF is on the left and the converted PNG is on the right. If anything, the new image’s colours are too understated, but they are good enough for me. At least now it doesn’t look like it was colourised by a raver on acid.

If you now go back and convert your original PDF, you will notice the greens look much better:

50 Shades of Shadows
Now you have the PDF split into separate images and correctly colourised, let’s get on to prettifying each image and putting them back together to make your preview. You’ll do this by taking one of the images you generated above, let’s say yourimage-0.png, and gradually building up the command line piling on the options until you get the result you need.
First step: adding a shadow to the image.
ImageMagick actually comes with a -shadow option:
convert yourimage-0.png -shadow 75x50+10+20 shadow.png
Let’s break down the parameters -shadow takes:
- The
75is the shadow’s opacity expressed as a percentage. 0% is transparent and 100% is totally opaque. - The
50is what ImageMagick calls the shadow’s sigma. In other places, namely in bitmap editing software such as Photoshop or GIMP, this is known as the shadow’s radius or spread. The larger the number here, the bigger and blurrier the shadow. - The
+10is the shadow’s displacement on the X axis. In this case, you displace the shadow 10 pixels to the right with regards to the original image. - Conversely, the
+20is the shadow’s displacement on the Y axis. In this case, you displace the shadow 20 pixels down from the original image’s position.
The last two parameters can also take a percentage (add %) as a value. Then, instead of pixels, the displacement is calculated as a percentage of the total size of the image:
convert yourimage-0.png -shadow 75x50+10+20% shadow.png
Will push the shadow 10% to the right and 20% down from the image’s original position. That is, if your image is a perfect 100×100 pixel square, the shadow will be displaced 10 pixels on the X axis and 20 pixels on the Y axis. If your picture is a 200×200 square the shadow will be displaced 20 (10% of 200) pixels on the X axis and 40 (20% of 200) pixels on the Y axis.
You can also use negative numbers in the displacement. In the line above, the shadow is displaced to the right and down, as if the light source were shining from the upper left. However, if you did this:
convert yourimage-0.png -shadow 75x50-10-20% shadow.png
the shadow would be projected upwards and to the left, as if the image were being illuminated from below and the right.
So, getting back on track, if you run
convert yourimage-0.png -shadow 75x50+10+20% shadow.png
the resulting image would look something like what is shown below.

Interestingly, ImageMagick colours shadows white by default!
This is easily solved. Try this:
convert yourimage-0.png -background black -shadow 75x50+10+20% shadow.png
and you’ll get this:
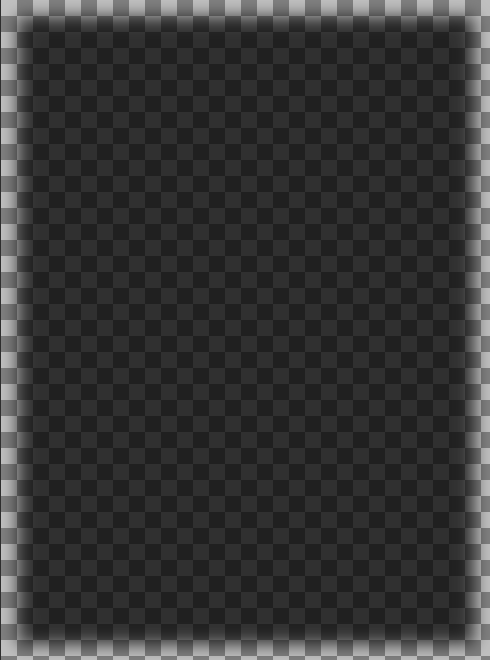
But, of course, you don’t really want an independent picture of the shadow of your page. What you really want is to have a stack of layers, with a (white) background at the bottom, then the shadow on top of that, and finally the image of the page extracted from the original PDF on top of everything else.
Well, lucky you: while you don’t push the final image out to a file, ImageMagick stores transitory intermediate images as layers… on a stack.
Try this:
convert yourimage-0.png \( +clone -background black -shadow 75x50+10+20% \) shadow.png
This actually generates two output images, shadow-0.png and shadow-1.png, one per layer. One of the layers comes from yourimage-0.png. The other comes from the +clone option.
What’s going on here is that you give convert the input image (yourimage-0.png) and that goes onto the stack as layer 0. Then you tell convert to +clone layer 0 (+clone creates a copy of the last image that you put on the stack). Now you have two layers. Then you transform the cloned image into a shadow of itself as explained above. When you try to output, convert sees there are two images/layers in the stack and, as you haven’t given any instructions as to what to do with them, it outputs two images, one per layer.
But what you really want is to merge them both together, right? You can do that with
convert yourimage-0.png \( +clone -background black -shadow 75x50+10+20% \) -layers merge shadow.png
Unfortunately, the resulting image is still not what you want:
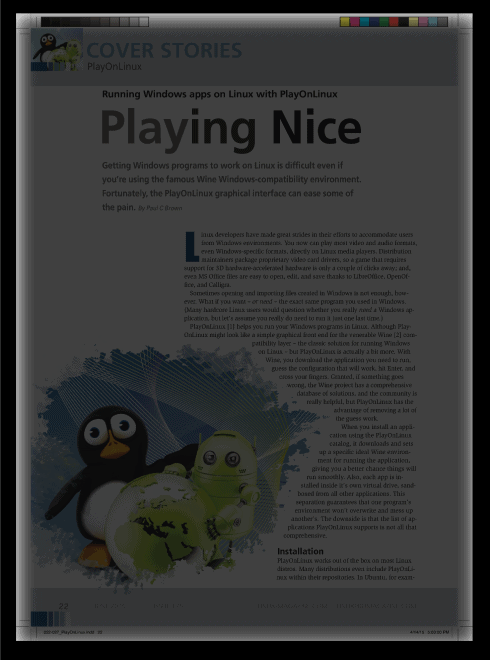
The shadow is on top because ImageMagick piles the layers from first (the original PNG image in this case) on the bottom, to last (the shadow) on top. What you need is to swap both layers around:
convert yourimage-0.png \( +clone -background black -shadow 75x50+10+20% \) +swap -layers merge shadow.png
That will put the layers in the correct order (+swap unsurprisingly swaps the order of the last two layers), but renders the result with a black background. As your shadow is also black, you won’t be able to see it. You need to add the white background we mentioned above:
convert yourimage-0.png \( +clone -background black -shadow 75x50+10+20% \) +swap -background white -layers merge shadow.png
And we’re done at a last. Check it out:
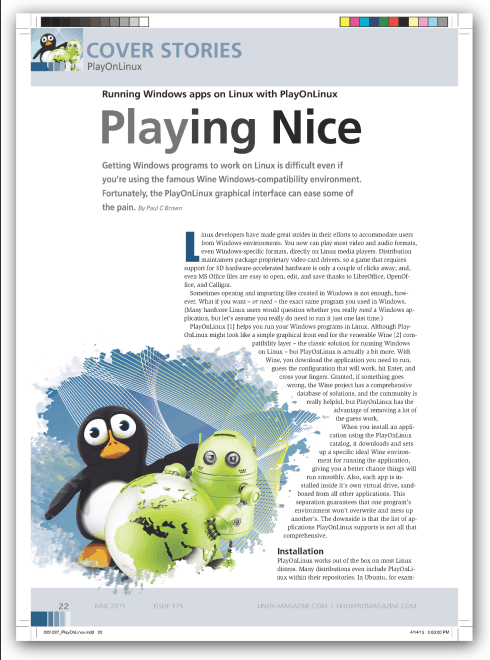
You can now put this command line into a for ... do ... done loop to add a shadow to all the images you generated from the PDF.
Something like this:
for i in yourimage-*.png
 do
  convert $i \( +clone -background black -shadow 75x50+10+20% \) +swap -background white -layers merge ${i%.png}.shadow.png
 done
would do the job.
The Full Montage
To sew all the images together you’ll use ImageMagick’s montage command. As this tool is designed to do just that, i.e., join images together, the command line is quite straightforward:
montage -tile x1 -geometry +1+1 yourimage*.shadow.png yourimage.jpg
montage will take all the images that fit the pattern yourimage*.shadow.png and tile them along the Y axis (-tile x1) to make a horizontal row which it then dumps it into yourimage.jpg. If you want a column, you could do:
montage -tile 1x -geometry +1+1 yourimage*.shadow.png yourimage.jpg
If you want a grid with 2 columns and 3 rows, you could do:
montage -tile 2x3 -geometry +1+1 yourimage*.shadow.png yourimage.jpg
… and so on.
The -geometry +1+1 part of the command line works differently to how it does in convert. Here it tells montage to create an image as big as is needed to fit all the individual PNGs into it (otherwise montage assumes you need tiny thumbnails). For a more detailed explanation on how this works, check out montage’s online documentation.
Altogether now!
The thing to do now is to bring everything together into one script. My version looks like this
#!/bin/bash

# I am the convertPDFs.sh script

# ARGUMENTS
# $1 - PDF to convert
# $2 - Pixel Density
# $3 - Scale (in %)
# $4 - Shadow opacity
# $5 - Shadow sigma
# $6 - Relative distance of shadow (%)

# Convert PDF to PNGs (one image per page)
convert -density $2 $1 -profile /usr/share/ghostscript/9.15/iccprofiles/default_cmyk.icc -profile /usr/share/color/icc/OpenICC/sRGB.icc -scale $3% ${1%.pdf}_%03d.png

# Add shadow
for i in ${1%.pdf}*.png
 do
  convert $i \( +clone -background black -shadow $4x$5+$6x$6% \) +swap -background white -layers merge ${i%png}shadow.png
 done

# Mount into one image one after the other
montage -tile x1 -geometry +1+1 ${1%.pdf}*.shadow.png ${1%pdf}jpg

# Remove temporary unnecessary PNG files
rm -f ${1/.pdf/}*.png
And it allows you to input all the values you need as parameters. To do something similar to what you have done step by step in this article, you would run the script like so:
convertPDFs.sh your.pdf 150 50 75 10 10
This outputs the image you can see at the top of this article.
Conclusion
I’ve said it before and I’ll say it again: ImageMagick is an amazingly powerful toolbox. By combining options and chaining several tools together, it is hard to think of an image transformation process that cannot be carried out using a convert, montage, identify and so on. Being able to apply unsupervised changes massively to whole directories full of files makes ImageMagick a time- and life-saver.
Before you even think of firing up a heavy graphical image editor, ask yourself if what you’re going to do is something you’ll do more than once. If the answer is “yes”, it’s a task you should probably leave to ImageMagick.