Mining for Education
How would you feel if all the food in your child’s school canteen were provided by one manufacturer of packaged snacks and soft drinks? How would you feel if your child’s diet were limited to crisps, cheese-flavoured tortilla chips, and sugary, carbonated beverages, with no chance of a healthier alternative?
Contents
This is a very long post, and much of it may not be relevant to you, so, if you want to jump to the parts you’re interested in, here’s a handy index:
My guess as a parent myself is that you would think that only allowing junk food into your child’s school is a horrible idea, so much so, you could consider changing her to another school. But what if this were a nation-wide thing?
Not only that, but the junk-food provider has put its logo everywhere. It’s on cups, plates, and posters hanging from classrooms. And, talking about classrooms, when the time comes to learn about nutritional facts, the textbook chapters turn out to be written by the marketing department of the very same snack-manufacturing company.
Most parents would — hopefully — find this outrageous. However, the outrage is spared when this exact same thing happens in computer science class and even during any CAL (Computer Assisted Learning) activity.
Students are not taught word processing, they are taught Microsoft Word. They are not taught presentation skills, they are taught Microsoft Powerpoint. They are required to present their work, be it essay, slideshow, or graph, in Microsoft-owned proprietary formats, recorded onto thumb-drives formatted with a Microsoft-patented file systems. Nothing else will do.
For a mega-corporation like Microsoft this makes perfect sense. Not only is the education market immense and juicy in itself, but the prospect of shaping students into future workers, managers, and entrepreneurs that have literally and formally learnt to depend exclusively on their products must be irresistible.
But, while Microsoft products are prevalent for secondary and university level students, the company was missing the primary slice of educational pie. As acute market manipulators, Microsoft recognise that brainwashing works better the earlier in life you start. But until a couple of years ago, they just didn’t have that product to capture that demographic.
Now they do. Now they have Minecraft.
Dashing any hope that this immensely popular program will ever become open (as Markus “Notch” Persson said it may back in the day), Microsoft forked out 2.5 billion US dollars for Persson’s game back in 2014 and immediately got to work on expanding its appeal by penning deals with Lego, making it the star of its Hololens technology, and pushing for a movie; while at the same time limiting it’s functionality.
What? You hadn’t heard about that last thing? I’ll have you know that once you strip away all the new eye-candy and merchandising hype, you can check out where Microsoft wants to take Minecraft. By dumbing down the game to its mobile version, and porting it away from Java, Microsoft can better control what platforms it will work on (you know how Minecraft currently works fine on Linux because it is written in Java? That will be the first to go) and kill the non-Microsoft sanctioned modding scene in one fell swoop.
That’s how things are shaping up. The question is, before things go completely non-linear, has the Free Software community got a plan B? Is there an Open Source program that can rival with Minecraft?
An Open Solution
This article would be quite short if the answer were no.
To make sure I didn’t put me foot in it, I have dedicated the best part of four weeks researching alternatives. Not having had much first-hand experience with the original games (Infiniminer and Dwarf Fortress), I learnt the basics of mining and crafting, and then some. I chatted with developers and users on their IRC channels — mainly asking for help when I was stumped. I also got hardcore Minecraft players (namely my son and his pals) to try several FLOSS versions of the genre so they could give me feedback.
The verdict is out. The answer is Minetest.
I’m not going to state the obvious, like how Minetest is free as in “freedom” and “beer” and won’t cost you a dime to download, share and play; or how you don’t have to put up with any vendor lock-in shenanigans; or how it is supported by a community of people who really just want to build and play a really cool game, so features tend to get added over time, not arbitrarily taken away; as I say, I don’t want to state what is common for most Free Software projects… Well, okay I just did, but as if that were not enough, and apart from all of the above, Minetest is pretty freaking awesome in its own right.
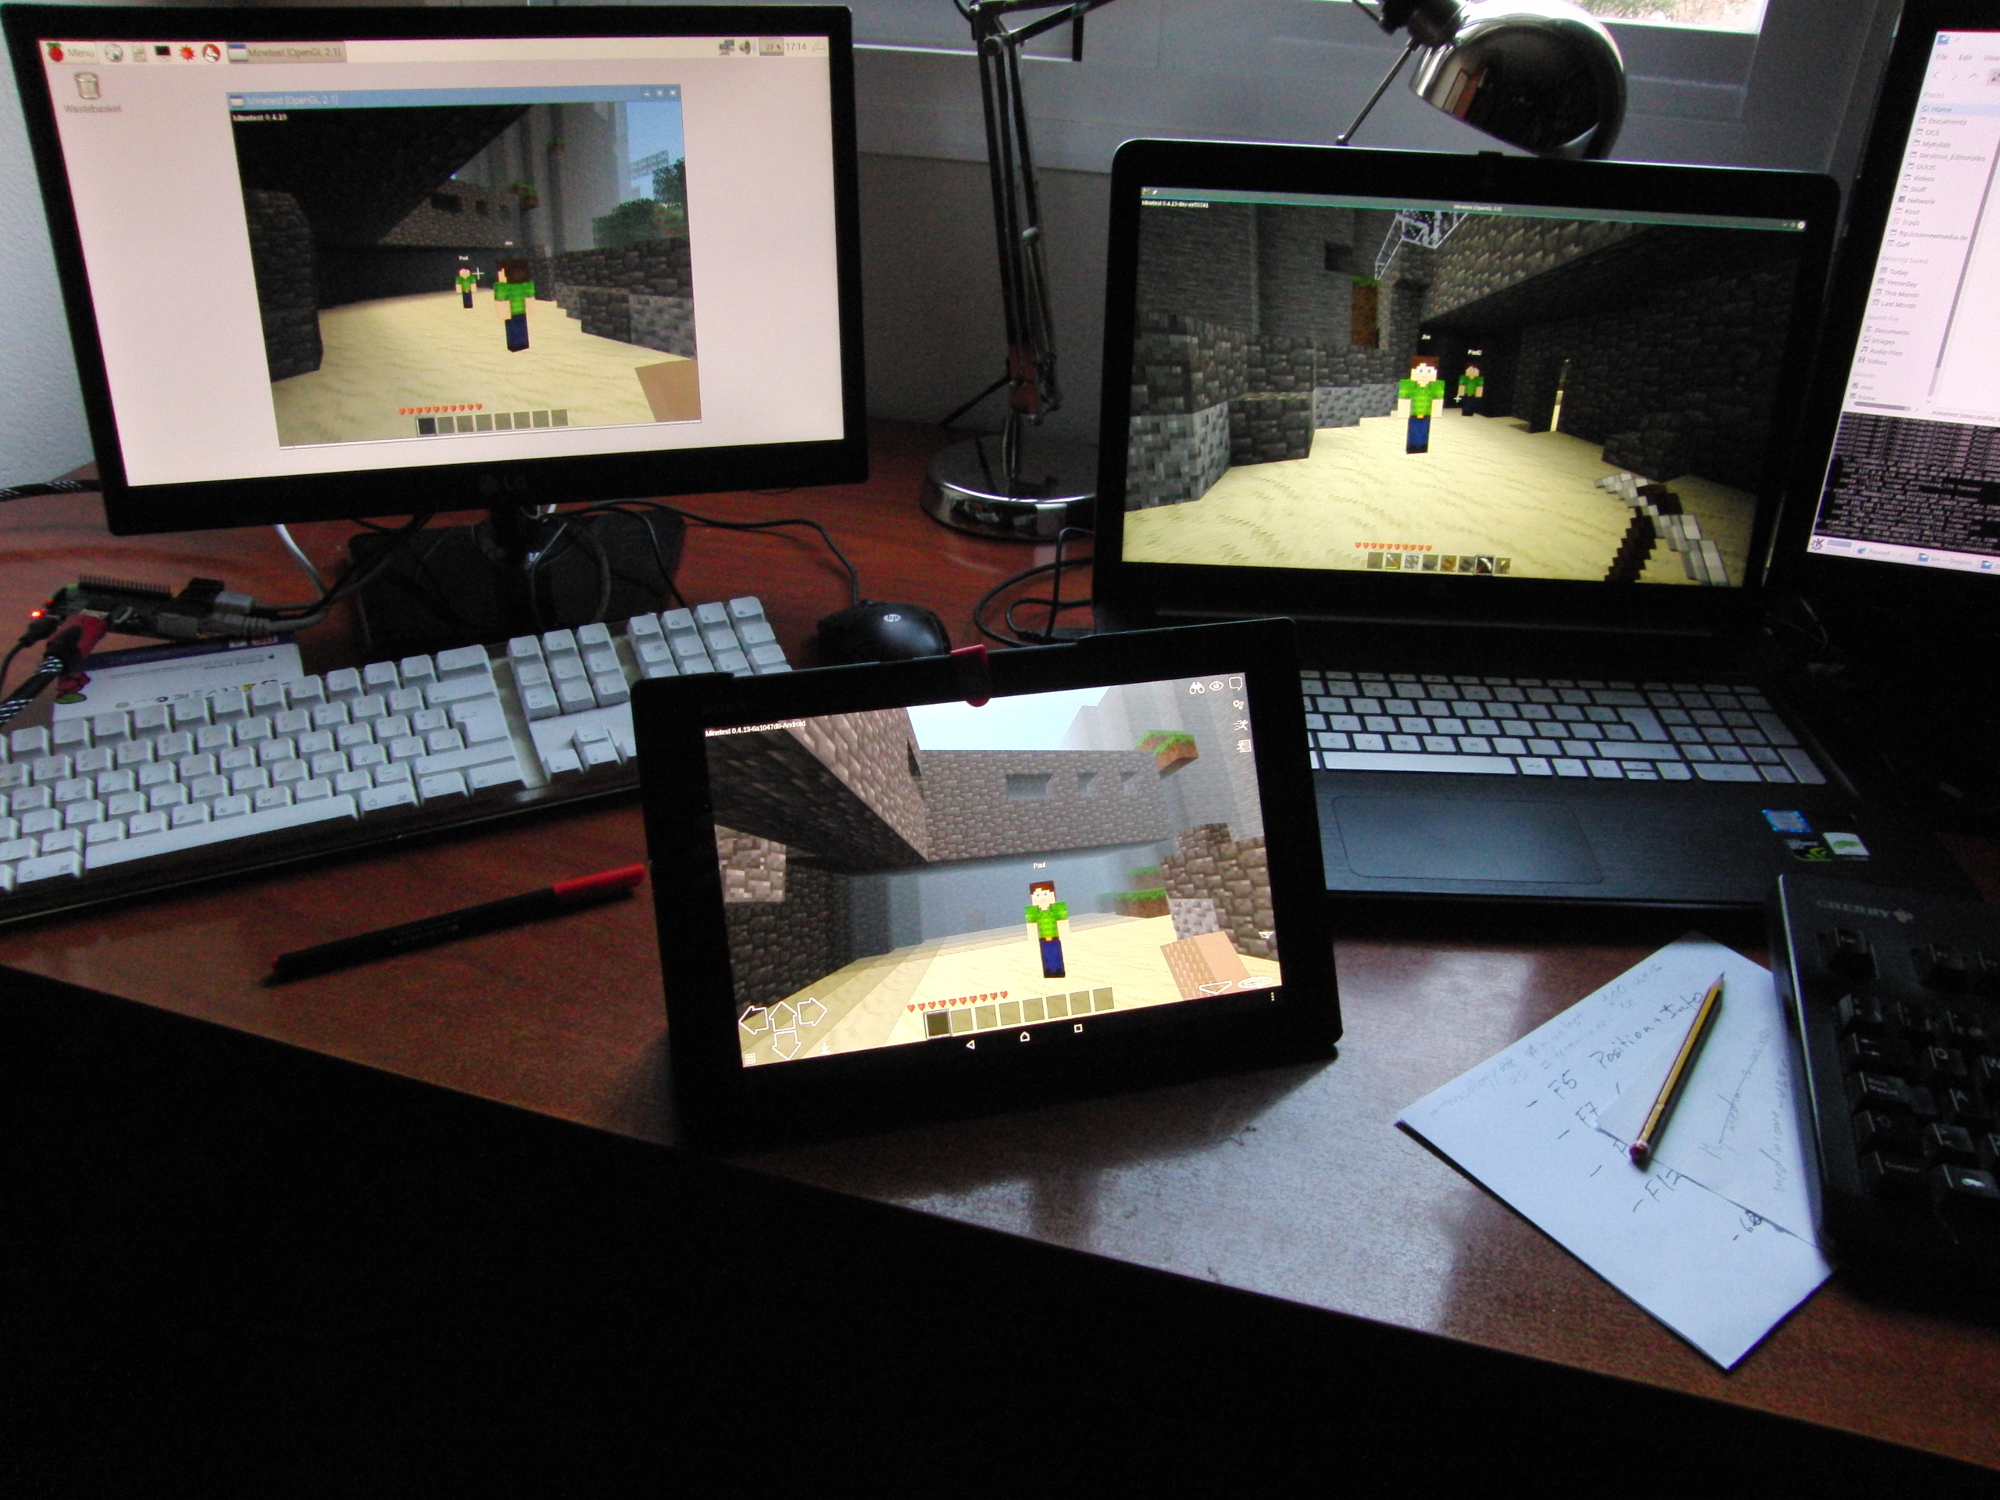
For starters, it is written in C/C++, making it lighter and faster than Minecraft. More importantly, it works more or less everywhere, on PCs running Free BSD, Windows, Linux (look for a package in your repositories), and MacOS X; on Android Phones; and, this is biggie for education, even on the Raspberry Pi.
Minetest on the Raspberry Pi
Getting Minetest running on Raspbian for the Raspberry Pi is pretty straightforward, Start by opening a terminal and typing
sudo apt-get update
sudo apt-get upgrade
to make sure everything is up to date. Then install Minetest with
sudo apt-get install minetest
You can also install a server, MOBs and mods that expand the original game. Search with
apt-cache search minetest
and choose what you think you may need.
Once your software manager is done installing, Minetest will be available in the Games submenu. But you won’t be able to play just yet!
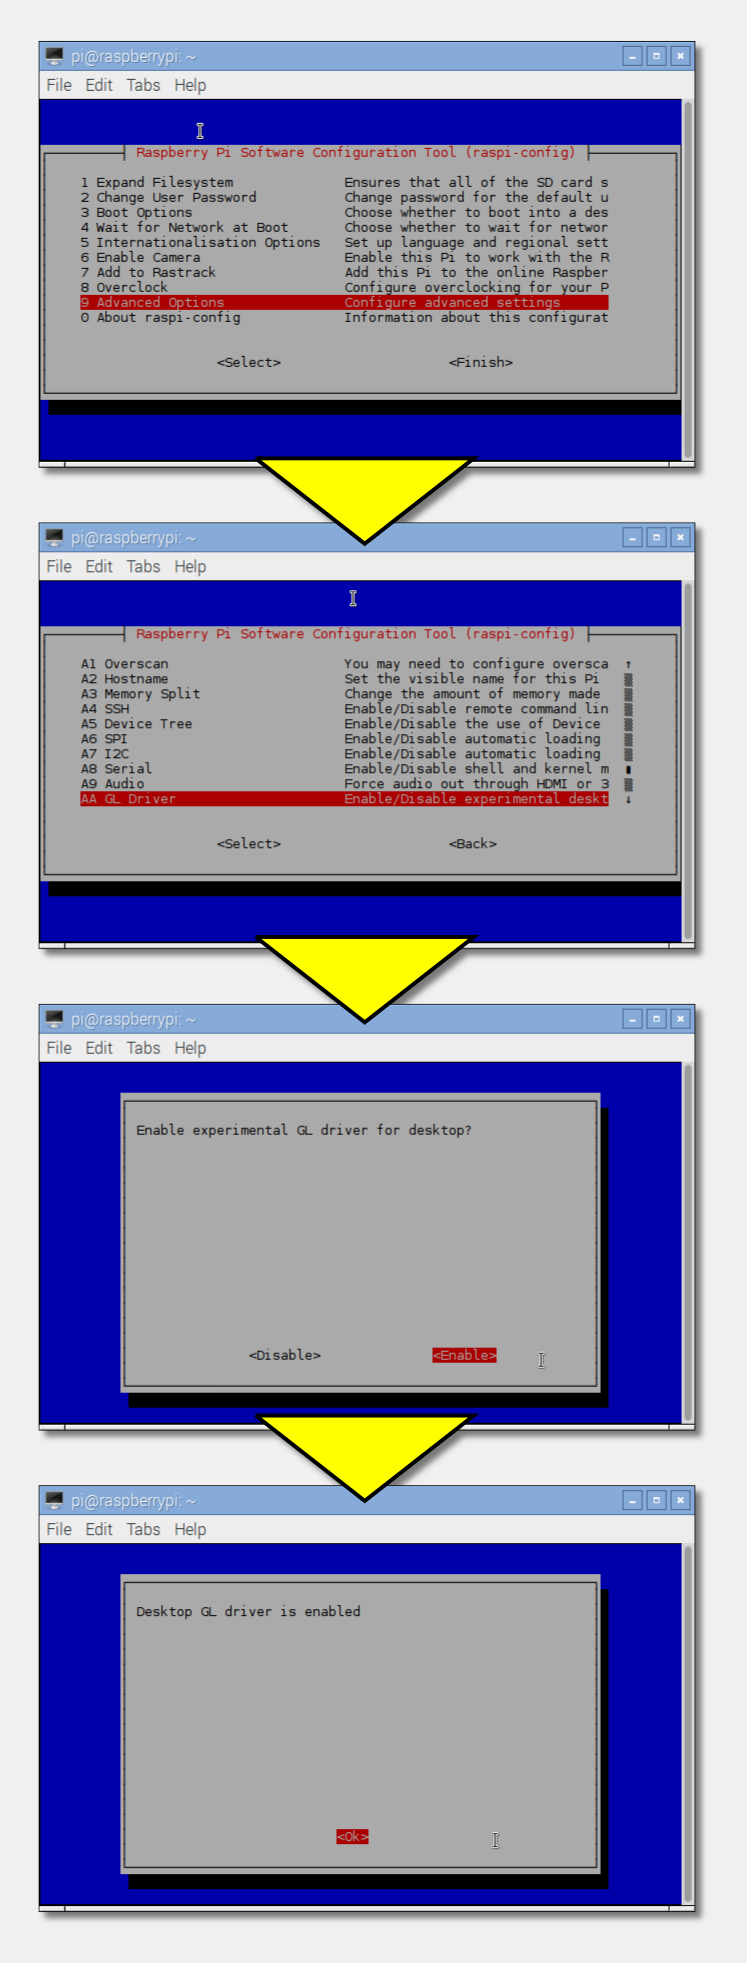
Minetest requires OpenGL, a collection of free and open source 3D libraries. To activate OpenGL run
sudo raspi-config
select Advanced Options and then AA GL Driver, Enable, and Ok. This will start the experimental OpenGL driver for your desktop.
Reboot your Pi. When you get back to your desktop, you will be able to run Minetest normally.
Note: You may have to disable the OpenGL driver if you want to play Minecraft.
The cool thing is, give or take a few features to accommodate touch-screens, it is the same game. Even the Raspberry Pi version is exactly the same as the PC version. This already is a mark above Minecraft that, for the Raspberry Pi, is very limited and does not give the same experience as its PC counterpart at all. I know this because I wrote about Minecraft on the Pi back in the day and things haven’t changed one iota since then.
You can download Minetest for your operating system, or if you are lucky enough to be running a GNU/Linux distro, just let your software manager do the heavy lifting for you. You may also find in your distro’s repositories extra Minetest files: a Minetest server for sure, and packages of mods that supply stuff like MOBs, weather, and so on.
It’s all about the Mods
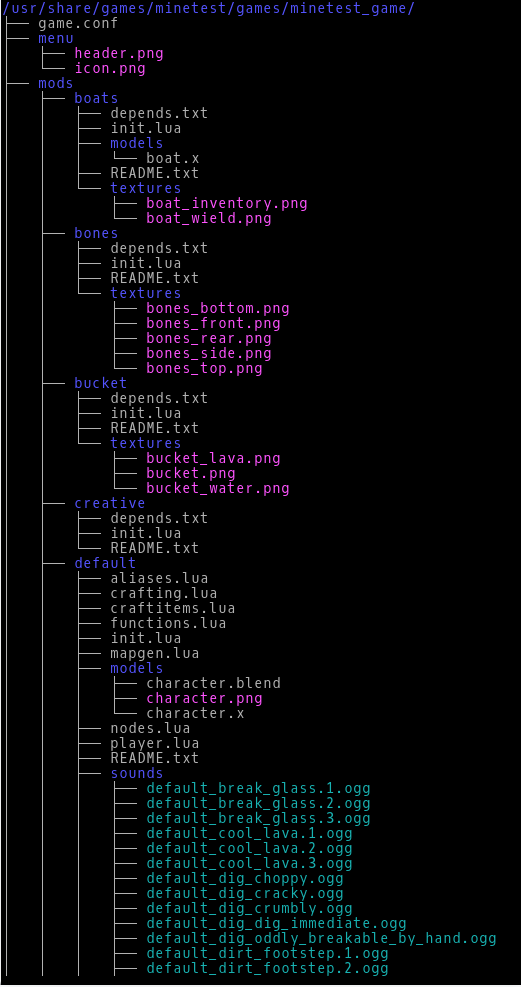
And this is one of the main differences between Minecraft and Minetest: in the latter, nearly everything is a mod. In fact, if you where to run Minetest without any mods at all, you’d find yourself roaming a world made of exclusively stone blocks. The standard “Minetest Game” is basically a catalogue of mods, blocks (“nodes” in Minetest jargon), textures, and sounds added to the basic engine. Take a peak in the games/minetest_game hanging off your shared minetest/ directory and you’ll see what I mean.
A Mod Store for Minetest
If you are running version 0.4.10 of Minetest, you may have noticed an Online mod repository button under the Mods tab in menu. Clicking it doesn’t do much. Looking at the debug.txt in your minetest directory, you’ll see that the program tries to connect to a web page in the Minetest forums that has ceased to exist.
According to the developers, the mod repository, and installing mods from within Minetest itself, is currently a failed experiment that is on hold until they find someone to implement a working and maintainable model. The 0.4.13 development version of Minetest does not have the button at all.
Good news for the Android Minetesters, though: there is an app that installs mods seamlessly onto your mobile device. It is available from the Google Play store and it works really well.
You can install new mods by downloading them from the Minetest wiki site. You then drop them into a mods/ directory (create it if it doesn’t exist) in your main minetest/ directory. Note that in Linux, this directory may be hidden — look for .minetest/ in your home directory.
Say you want weather, rain and snow and such, in your world. Move into your minetest/mods/ directory…
cd minetest/mods/
or
cd .minetest/mods/
and grab the weather mod:
git clone https://github.com/Jeija/minetest-mod-weather.git
The mod is now installed. That was easy, wasn’t it?
All you have to do now is activate it.
Fire up Minetest and, if you haven’t done so already, create a new world by pressing the New button in the Single player tab. A new dialogue will appear. Give your world a name and leave everything else as it is. Press Create.
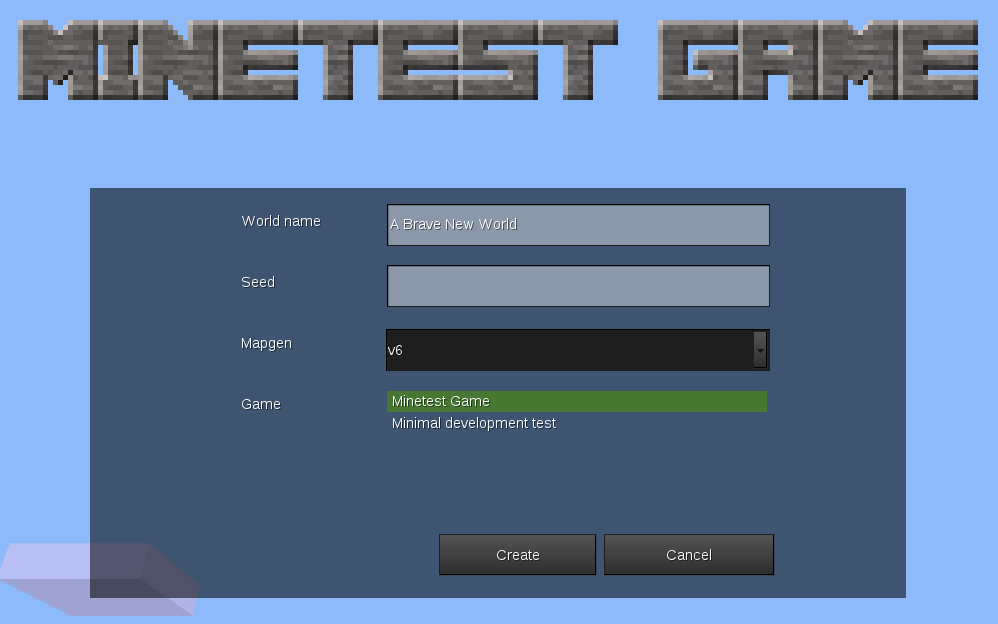

With your world selected, click the Configure button. This will show you a list of available mods. Double click on weather and it will turn from white to green. This means it will be activated when you start your world.
Click on Start Game and the weather mod will turn on the waterworks from time to time. If you are impatient, you can make it rain by opening the HUD ([F10]) and typing
/setweather rain
or
/setweather snow
at the prompt.

To make it stop, type
/setweather none
If you get an error saying you don’t have privileges to start and stop the rain, try giving yourself permission by entering
/grant [yourplayer's name] weather
into the HUD.
Nearly all [F...] keys have a function, and you can look them all up on the Minetest site, along with the rest of the keyboard settings. That said, some of the most useful ones are: |
||
|---|---|---|
| Key | Function | 2nd Press |
| F5 | Shows player coordinates | Shows server stats |
| F7 | Changes camera view | Cycles through camera views |
| F9 | Opens a minimap | Zooms in |
| F10 | Opens HUD | Closes HUD |
| F12 | Takes a screenshot | – |
Talking of the HUD… Of all of the above, maybe F10 deserves a closer look. The HUD, or Head Up Display, allows you to type in chat messages or commands that let you do more tham what you can do with the regular keystrokes.
By typing
/teleport 500,5,500
for example, you can jump directly to coordinates (500, 5, 500) — if you have the teleport privilege, that is.
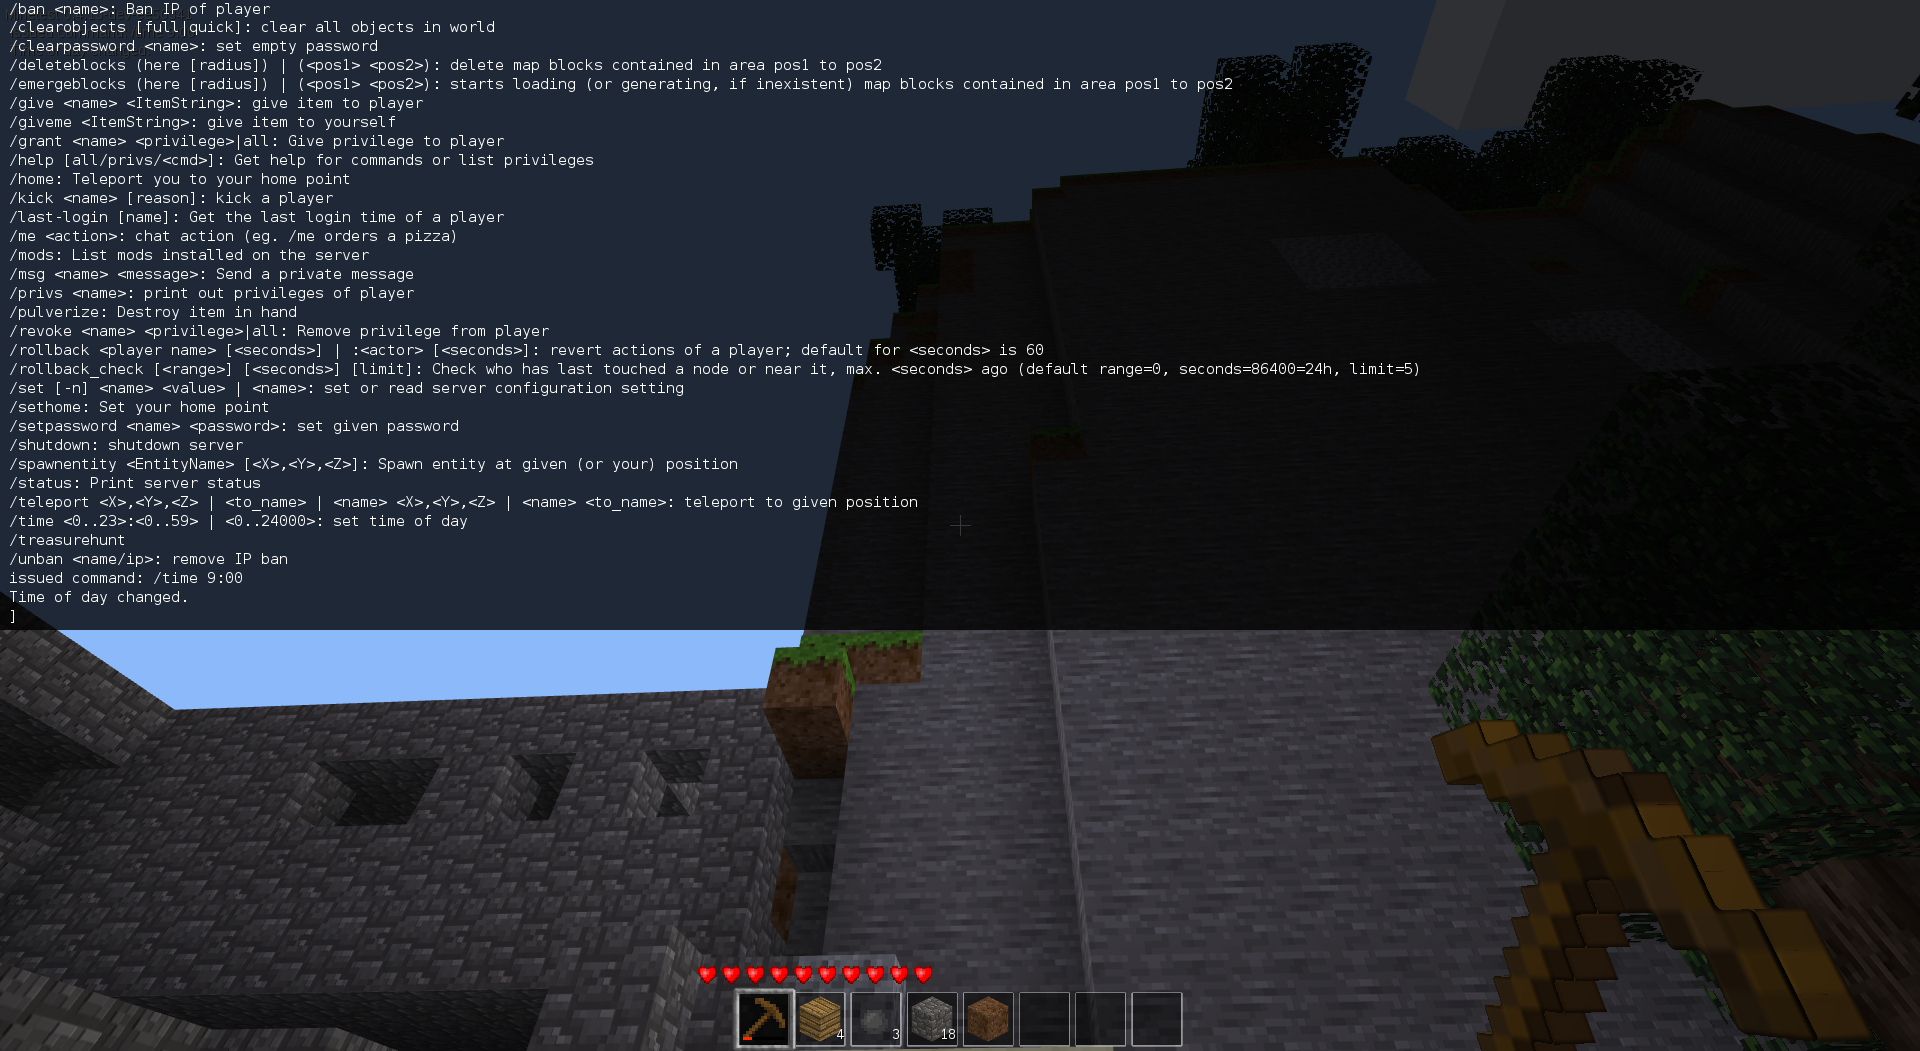
/time 9:00
will set the time of day to 9 o’clock in the morning.
/sethome
This command sets a point, for example, where you have built your refuge, you can always teleport to with the
/home
command — useful if you get lost or are in danger.
![Send chat messages to all players or private messages (using /msg [name]) by pressing [t] on your keyboard.](https://quickfix.es/wp-content/uploads/2020/10/fig10_chatmessages.png)
/msg [player's name] [message]
The command
/msg Paul Hi Paul!
sends “Hi Paul!” to the player Paul. You can also send messages to all players or private messages as described above by hitting the [t] (for talk) key.
If you administer your own world, you can use the HUD to issue instructions to control unruly players, as well as mod-specific commands (like the /setweather command we saw earlier). To see a full list of available commands use
/help all
Playing the Game

How different is it to play Minetest from Minecraft? Not much at all. Most key-bindings are exactly the same and of course there’s all the crafting. You don’t need a workbench in Minetest. Just press [i] and you’ll access all the slots with the materials and items you are carrying around, along with a crafting grid. That said, you do have to build a furnace to smelting ore into ingots.
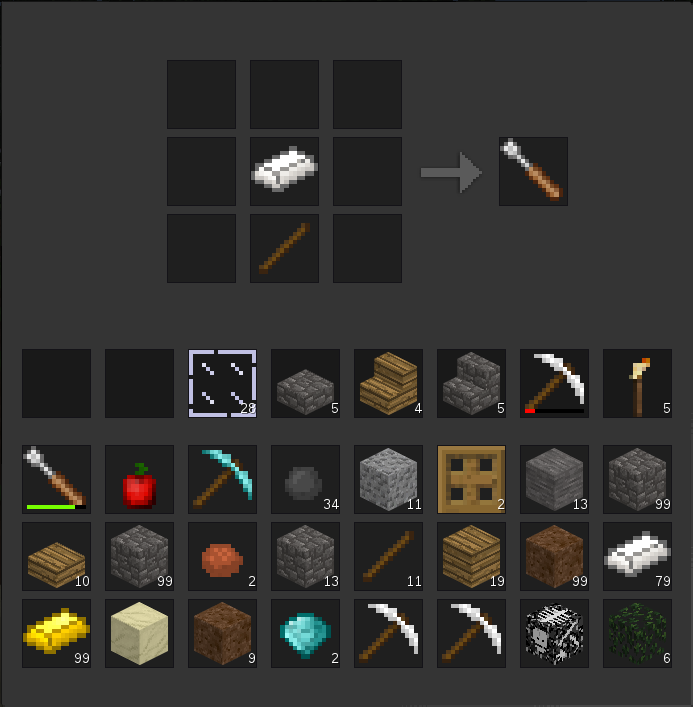
Along with pickaxes, shovels and swords, another very useful (and Minetest specific) tool you should build is the screwdriver. It is a good idea to make one of these early on the game, the moment you have some wood and iron. The screwdriver helps you change the orientation of other items. If you craft and place some steps, for example, and they are facing the wrong way, use the screwdriver on them and you’ll be able to twist them around.
Different mods will add new items you can craft and new raw or processed materials. The Technic module, for example, adds all sorts of hi-tech stuff, from copper wire for electric circuits, to diamond drill heads. This mod is continually being updated. One of the newest additions is the nuclear reactor, which is useful, but also dangerous!
Although the focus of Minetest is not so much on fighting off monsters (and that’s why MOBs are not included by default) as on building, having creatures threatening your homestead can certainly make things more fun. What is even more fun, however, is building and defending your homestead with friends.
Minestest Server
Setting up a Minetest server for your friends, colleagues or school is easy. Minetest comes in two parts: the client, which is the program you actually interact with directly; and a server, that generates the world, manages players, their location and their inventories, and with which you interact with indirectly.
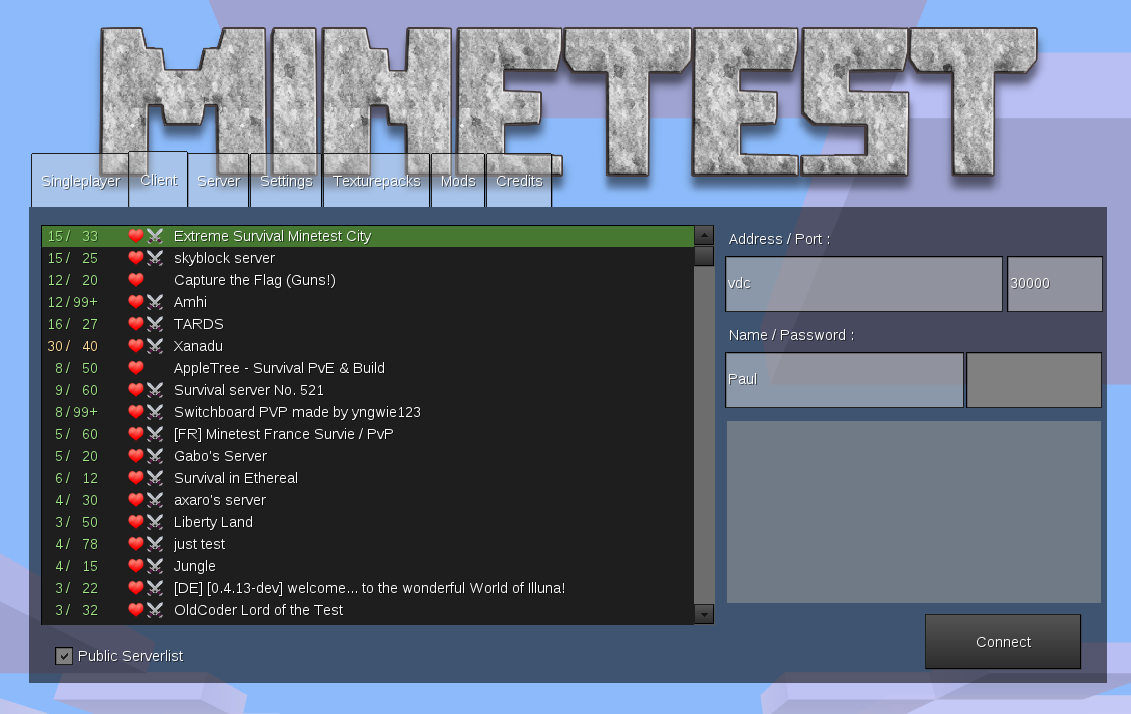
When you play single player, you are really running a server just for yourself and, in fact, if you just want to let friends into the world you are currently playing, you can exit to the menu and, under the Server tab, click on the Public checkbox. If your friends are on the a same network, all they will have to do is connect with their own clients to your IP address and start playing.
A Dedicated Server
Although you may want to avoid running a Minetest server for your organization in the background on somebody’s workstation, you don’t need a machine to exclusively run Minetest. Minetest is designed to be light and, with the power of modern hardware and disk capacities that nowadays run into the terabyte region, a regular tower computer will suffice. Hosting a Minetest server on your file or printer server will probably be fine as long as you are careful about security (see below).
Even a Raspberry Pi will do a decent job of running a nimble server for half a dozen or so users. However, if there are many more players, mobs wandering around, lots crafting, and extensive exploring going on, you may find the Pi becoming sluggish and you will have to upgrade.
If you are planning something bigger, maybe a public server, or a server for your whole school, you should consider a machine where the Minetest server can run headless, i.e. without a graphical interface.
On a Debian Linux and Debian-based system (e.g. Ubuntu, Mint or Raspbian) use
su
apt-get install minetest-server
on Debian, or
sudo apt-get install minetest-server
for Ubuntu, Raspbian and Linux Mint to install the standalone server.
You can start the server by hand as a regular, non-root user by typing
minetestserver --info
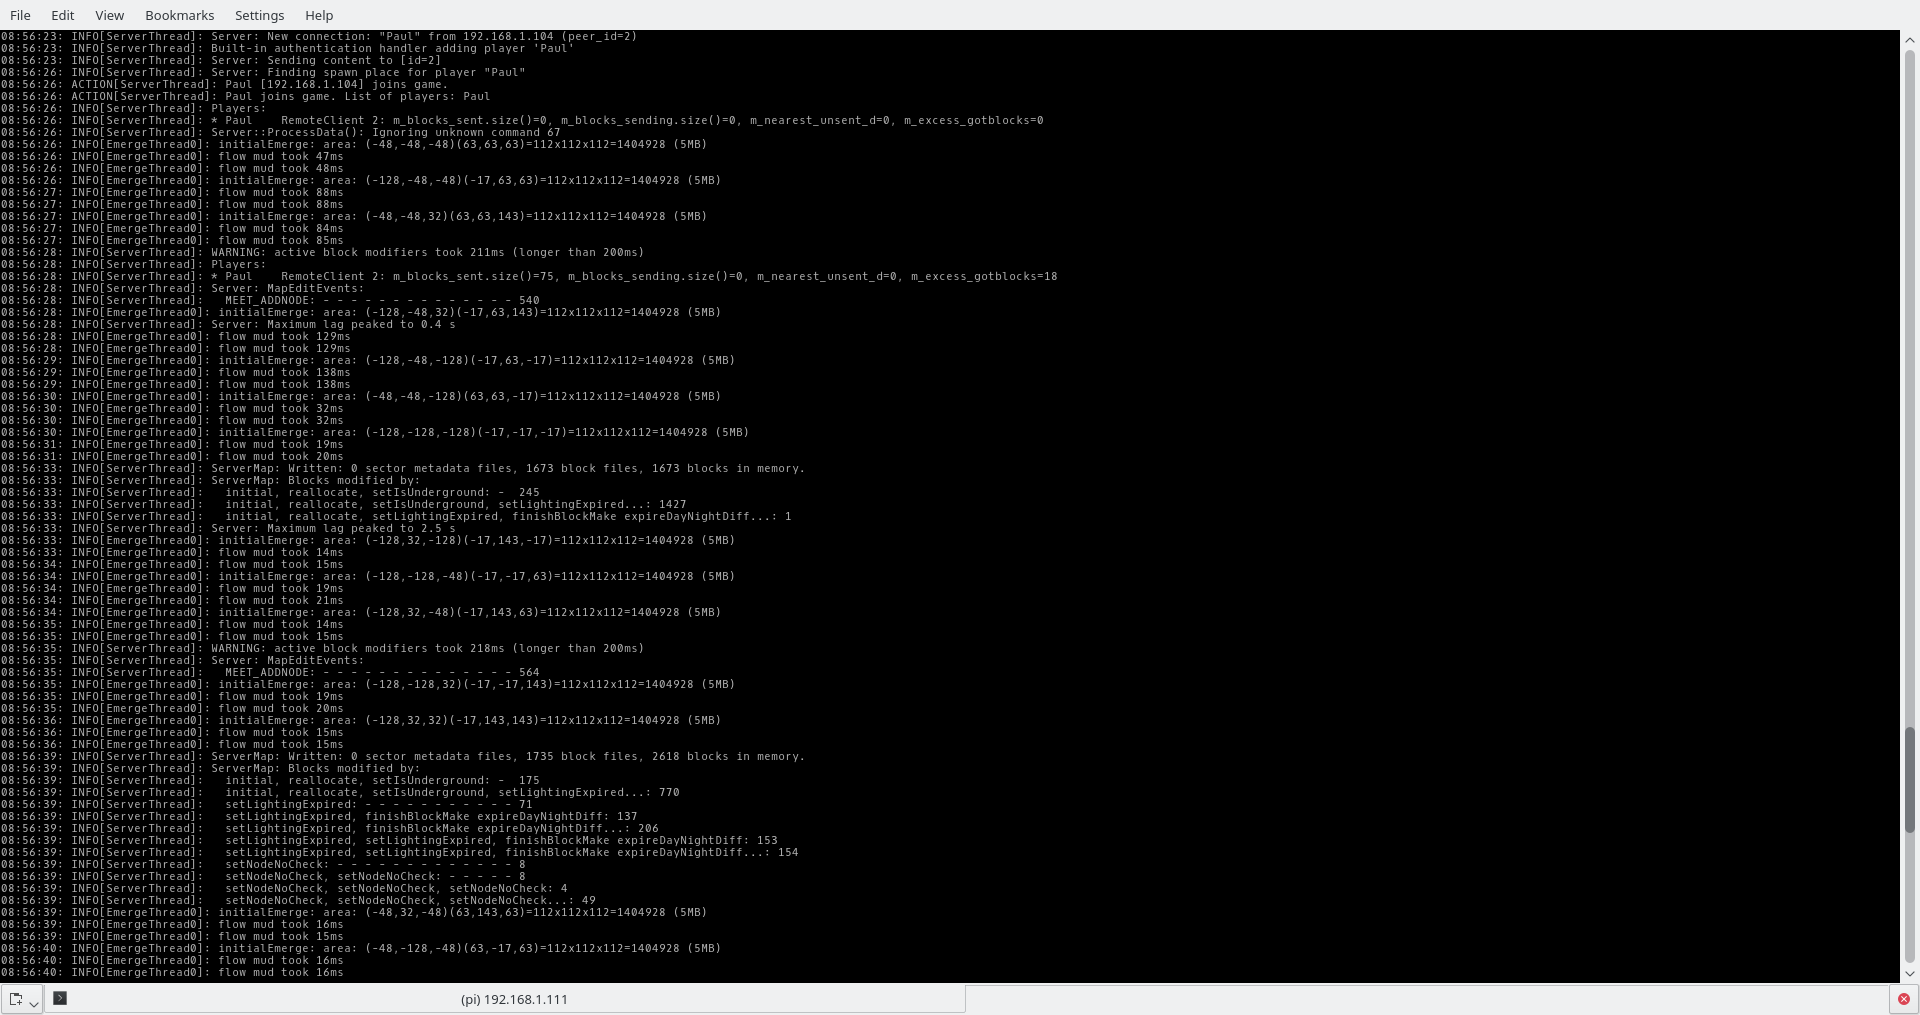
The --info parameter will give you feedback on any problems and will also show events, such as when a user connects to the server to start playing.
This is fine to check that everything works, but the Minetest developers recommend, for security reasons, using a non-root or a user without sudo privileges to run the server. Stop the server with [Ctrl] + [c] and create a user with
su
adduser minetest
if you are using Debian, or
sudo su
adduser minetest
if you are using Ubuntu, Mint or Raspbian.
Fill in the password for the new user. You can leave everything else blank.
Leave superuser mode (exit), change to user minetest and cd into their home directory:
exit
su minetest
[fill in minetest's password]
cd
Run minetestserver again as the new user.
The Minetest server by default listens on port 30000 (although you can change that with the --port parameter), so you will have to poke a hole in your firewall and forward to that on your router if you are running your server on your local network and want players from outside to access you game.
To install mods, copy them to the /usr/share/games/minetest/games/minetest_game/mods/ directory and they will be loaded and enabled automatically when your server runs. To check that the mods you want have loaded, go into the game, open the HUD ([F10]) and type /mods.
If you want to restrict access to your server because you only want to play with your friends and don’t want strangers spoiling your fun, create a .conf file and load it when you run the server.
A Minetest .conf file is a plain text file with a series a key = value pairs on each line. If you want to limit users to only your friends, you could for example require players to use a password and set a first time password that only you and your friends know. The .conf file would look like this:
name = My Minetest
disallow_empty_password = true
default_password = SecretPassword
motd = If you haven't done so, please change your password.
where SecretPassword is the password you send your friends.
This will also display a message to all users asking them to change the default password. Users can change their passwords pressing [Esc] (or the back button on Android) from within the game and clicking on the Change Password button.
Start the server using
minetestserver --config /path/to/you/configuration/file.conf
to force it to load your .conf file.
There is an example of a configuration file with many more options at the Minetest GitHub repository.
Once you are up and running, you can give privileges to each user as you see fit by editing the auth.txt file you’ll find in your world’s directory. Each line looks like this:
Paul:x69lFMHqU/qrUHlRoCpIF34/56M:interact,shout
You are looking at three fields separated by colons (:). First you have the user’s name, then an encrypted version of his/her password, and then a comma-separated list of his/her privileges. You can add privileges by adding to the list:
Paul2:x69lFMHqU/qrUHlRoCpIF34/56M:interact,shout,home
The home privilege allows a player to use the /sethome and /home commands we saw above.
Another way of granting privileges would be to give the privs privilege to your own player and then you will be able to grant new privileges directly in-game from the HUD. The command
/grant [player name] home
would grant the home privilege to a player. You can also grant your own player more privileges in this way.
You can revoke a player’s privileges with
/revoke [player name] [privilege]
To see what privileges you have, type
/privs
into the HUD, or
/privs [player name]
to see what privileges another player has.
Once you are happy with the configuration of your server, you may want to configure your system to boot Minetest every time you switch your computer on. To do this you can set up a cron task that runs at boot.
Access your minetest user from a terminal window, and open the crontab editor with
crontab -e
Add a line like the following at the end of the file:
@reboot /usr/games/minetestserver --config /path/to/you/configuration/file.conf
You should also add any other options you need, such as the name of the world you want to load on start up, the port you want the server to listen on, and so on. To see a full list of command line options, type
minetestserver --help
in a terminal.
Most modern Linux distributions, including Debian, Ubuntu, Mint and Raspbian, now use systemd to manage things like daemons and services. Upcoming versions of Minetest will take advantage of this subsystem and will automatically install configuration files and create a user to run them.
It’s Educational
The strongest argument in favour of using Minetest over a proprietary alternative is its modularity. Learners will love how they can change every single aspect of their character and the items within the world.
![Even the characters' shapes can be changed using Blender[http://wiki.minetest.net/Using_Blender].](https://quickfix.es/wp-content/uploads/2020/10/fig16_Blender.png)
The modding goes beyond the purely aesthetic, however, and the Minetest developers have created a whole framework separate from the core program that allows users to create new blocks and tweak their behaviour, design new items to craft, and build nearly anything else you can think of. You can also create mods that affect the behaviour of the world and allow you to, for example, create games within the Minetest game itself.
Take for example the set of educational mods listed in the Minetest wiki. These range from packages of simple alphabet and number blocks, to mods that make Minetest compatible with Minecraft’s Python API for the Raspberry Pi.

Let’s see an example.
The Minetest-teaching mod provides you with tools to set up arithmetic and spelling puzzles. If students solve the puzzles, you can reward them with rare items or blocks.
To start using it, download it to your minetest/mods/ directory:
https://github.com/pbrown66/minetest-teaching.git
Rename the directory to teaching/ or it won’t work. Run Minetest and activate the mod. To set up a puzzle, say 2+2=, enter the game using creative mode and give yourself teacher privileges. To do this, open the HUD ([F10]) and type
/grant [your user name] teacher
Press [F10] again to close the HUD.
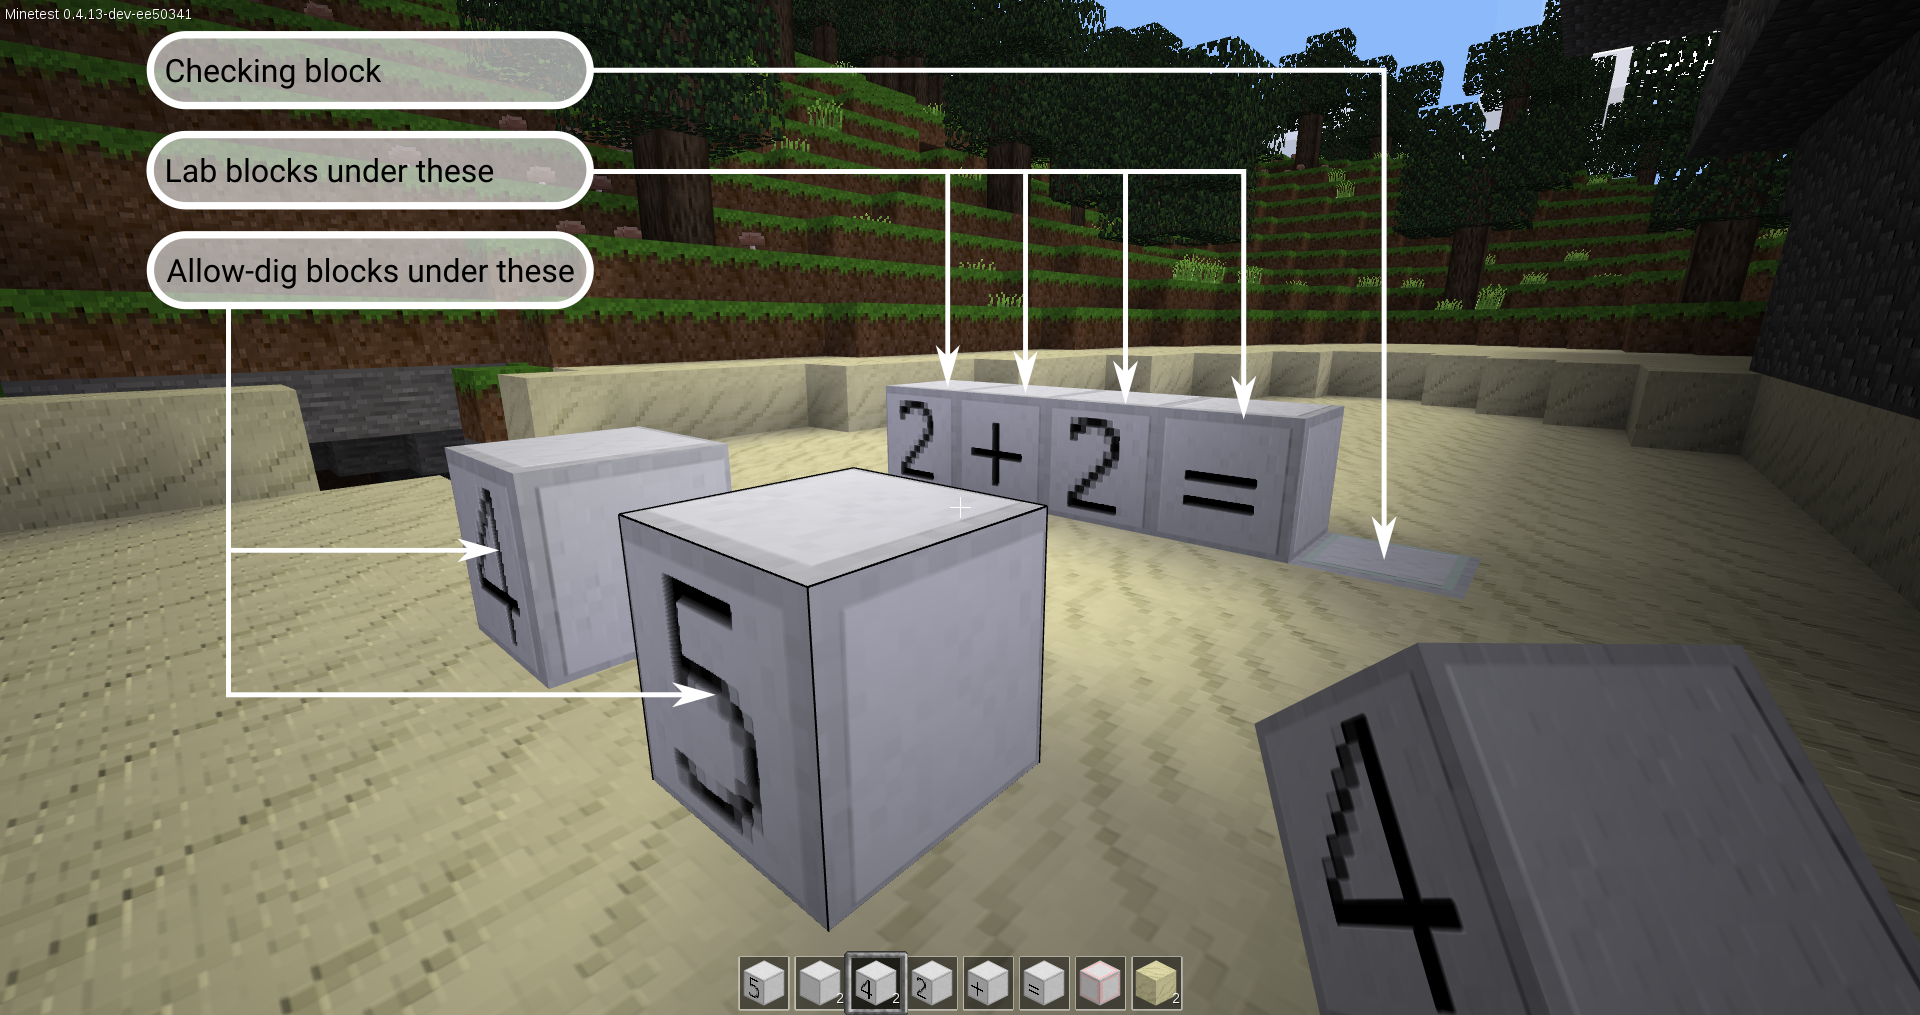
To lay out the puzzle, dig a trench 5 nodes long. Open the inventory ([i]), choose the Nodes tab and move along until you see the teaching blocks.
For the puzzle above, you’ll need four lab blocks, a checking block, two allow-dig blocks, two 2 blocks, a + block, a = block, a 5 block (an incorrect answer), and a 4 block (the correct answer).
Put the four lab blocks in the trench starting on the far left. In the hole that is left, put the checking block. Place the 2, +, 2, and = blocks on top of the lab blocks, as shown below.
By putting the blocks that make up the puzzle on lab blocks, you make them indestructible and the students won’t be able to come in and accidentally-on-purpose destroy your activity.
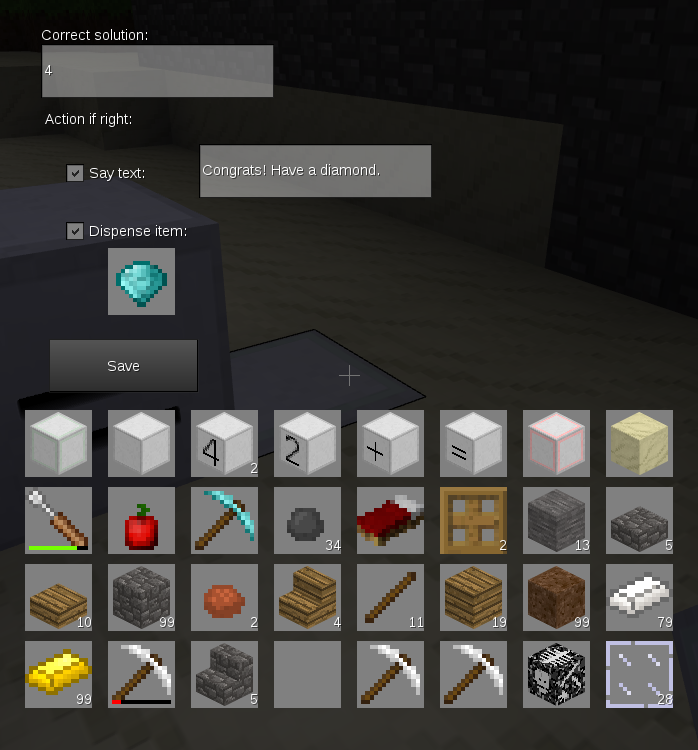
Right punch (punch using the right mouse button) the checking block on the right of the trench and a dialogue window will open. Use the dialogue to tell the block what the correct answer is and have it dispense a nugget of wisdom and a prize. In the example below, the answer is, of course 4. When the student gets the right answer, the message “Congrats! Have a diamond.” appears in their chat and a diamond will pop up on top of the solution block.
For students to solve the puzzle, they have to pick up the solution blocks and place the correct one on the checking block. You can leave the solution blocks anywhere, but you have to place them on allow-dig blocks, otherwise they are indestructible and the students won’t be able to pick them up. So dig two holes where you want to leave the solution blocks, place an allow-dig block inside each, and plunk the 4 and 5 blocks on each allow-dig block.
Now you can let your students loose in your world.
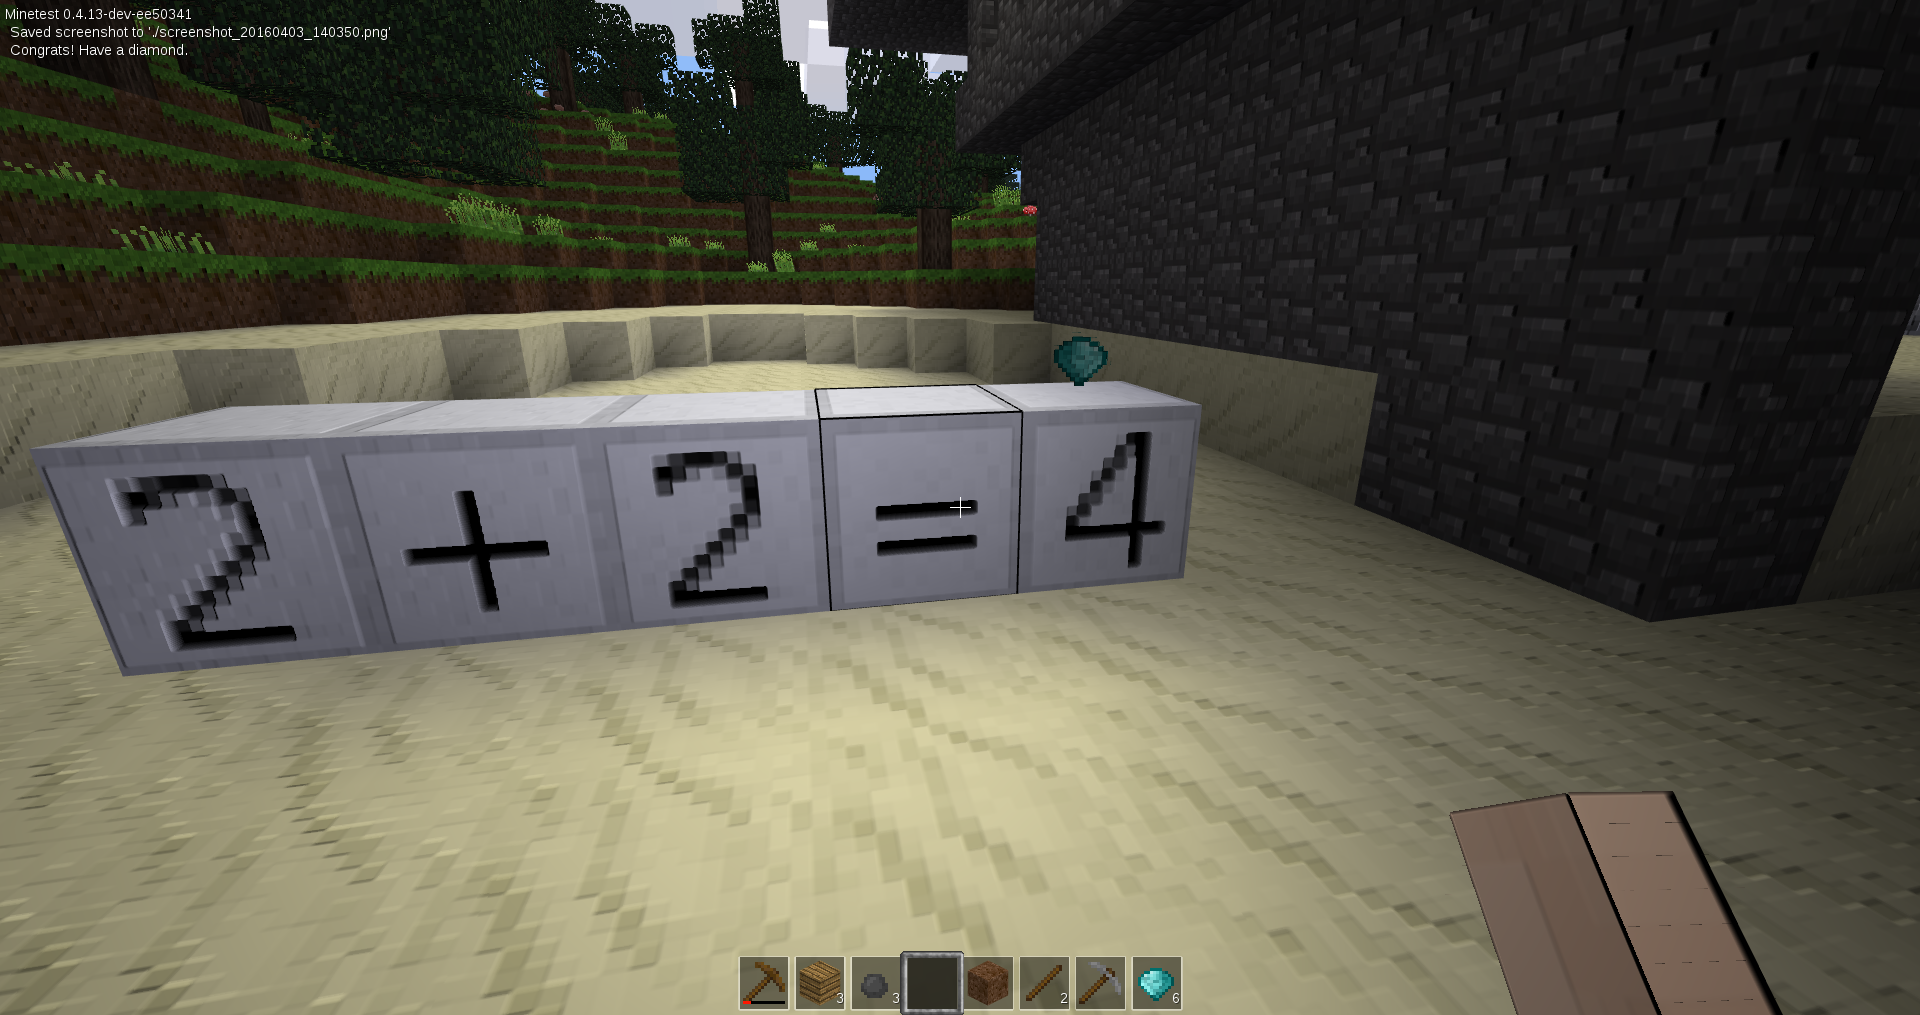
When a student places an incorrect answer (in our example, the 5 block) on the checking block, nothing happens. She can destroy it and try again. But when she places the correct answer (in this case the 4 block), the puzzle dispenses the prize and locks up, avoiding her from punching and breaking the block, and placing it again over and over to get an unlimited supply of diamonds.
Only the player with teacher privileges can reset the puzzle. He can do so by punching the solution block, punching the block underneath the solution and replacing and reprogramming the checking block.
Building Blocks
All this magic modding is done by using Lua, a high-level programming language similar in many aspects to Python (the language used in the Raspberry Pi Minecraft edition). It is a nice choice because it is clean — you don’t have to worry about strange symbols like in PERL, or trailing semi-colons like in C/C++; it combines advanced Object Oriented and Functional programming features; and is specifically designed for video-game programming.
Although this is not the place to teach Lua (there are already excellent resources online), and explaining all the ins and outs of Minetest modding would also add too much to what is an already exceedingly long post, let’s at least look at the anatomy of a Hello World-like mod so you can get your head around how to get started.
Open a text editor and copy the following:
minetest.register_on_joinplayer(function(player)
    minetest.chat_send_all("Hello " .. player:get_player_name() .. "!")
end)
This is your first mod.
To understand the first line, think that in Minetest most things run when the player does something or something happens in the world. These are called events. When a player joins a Minetest world, a joinplayer event is fired. The register_on_joinplayer is an in-built method that tells the minetest object to listen for such an event and to execute a function when it happens. The function is what you can see between parenthesis.
In this case, the function takes the player object associated with the event and, on the second line, extracts the player’s name using the in-built get_player_name() method. It plunks the returned name in a string (note that .. is what Lua uses to concatenate strings) that is then sent out to all users via the in-built chat_send_all method.
Once you’re done copying the code, create a directory called hello/ in minetest/mods/ (or .minetest/mods/) and save your file as init.lua into your new directory. You can also create a text file in the hello/ directory with a brief description of the module — save it as description.txt and it will show up in the Mods tab of Minetest’s control panel.
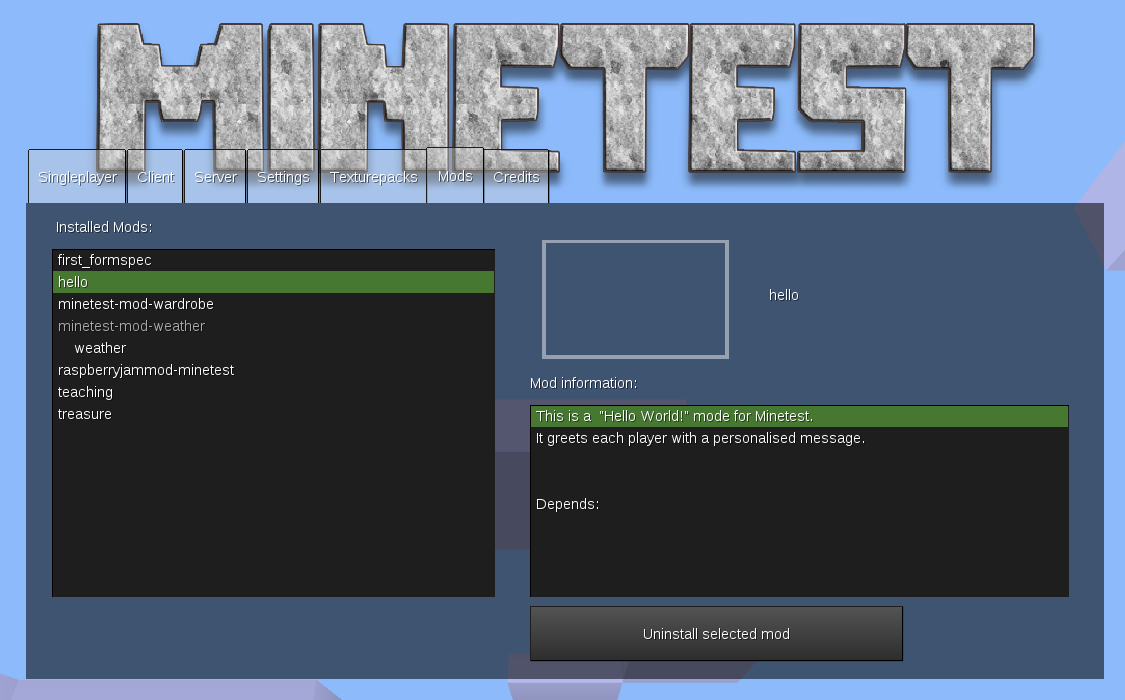
Activate the mod and all players will be greeted as they join the game.
To learn more on how to write Minetest mods, visit the official developers’ wiki [http://dev.minetest.net/Main_Page] and check out the minetest methods [http://dev.minetest.net/Category:Methods]. This will give you an idea of what you can do with the Lua framework. Also don’t forget to read up on how you should organise the bits and bobs within your mod directory[http://dev.minetest.net/Intro#Mod_folder_structure].
Caveats
Minetest is pretty great, but, of course, not perfect. The complexity of the underlying software means that both client and server can crash from time to time… Or at least that is what the developers tell me. Interestingly, during the research for this article, I did not experience any crashes, even when using the unstable development branch.
A much more real issue is this: If Minetest aspires to be used as educational software, which it should, it does not only have to compete with the Minecraft juggernaut on its merits, but also with the fact that Minecraft comes pre-installed in Raspbian for the Raspberry Pi and with its Python interface.
Although Minetest’s Lua API is much more powerful than Minecraft’s Python, so much so that the latter is a toy in comparison, and God forbid me from advocating adopting a technology just because it is the de-facto standard, one has to consider humans’ natural resistance to change. Requiring educators to switch game and programming language is going to be hard sell.
Then there’s the modularity. As mentioned above, this makes Minetest great, but it can be intimidating for new users. A clean install of Minetest does not come with much: no mobs, no survival, no food, no weather… A new user would be excused if, when playing for the first time, she thought this were a very paltry copy of Minecraft. I would suggest shipping a “consumer version” of Minetest, packing as many features Minecraft players expect as possible, and thus avoid newbie-disappointment.
Finally there’s my pet peeve I bring up time and time again: documentation. I had to resort a lot to the Minetest IRC channel. The Minetest wikis, although they boast impressive indexes, contain too many empty stubs. Examples of code, when they exist, are unexplained and have no comments. There are no “learning by doing” tutorials. When you ask, the more experienced modders (who otherwise are very patient and helpful) refer time and time again to a specific text file which contains short and often cryptic descriptions of modules and attributes. Again, there are no examples in this document that would help new users understand the API tools.
Conclusion
Minetest has come an incredibly long way since we last talked about it [http://www.ocsmag.com/2014/06/10/minetest-the-free-open-sourced-version-of-minecraft-joins-pling/]. The fact alone of that it works on all platforms, be it Linux, Windows, OS X, Android or Raspberry Pi, put it clearly ahead of the competition. It has developed a healthy and active community and, being open source and having an open and relatively easy API, has made it the subject of literally hundreds of expansions and mods.
As a teaching/collaborative tool for children (and adults) it is ideal, even better than Minecraft, due to its open and free nature and powerful, versatile Lua framework. This is logical: Minecraft was once described as “social Lego” and is praised because it encourages collaboration, but, what could be more social and more collaborative than free software all the way down to the source code?
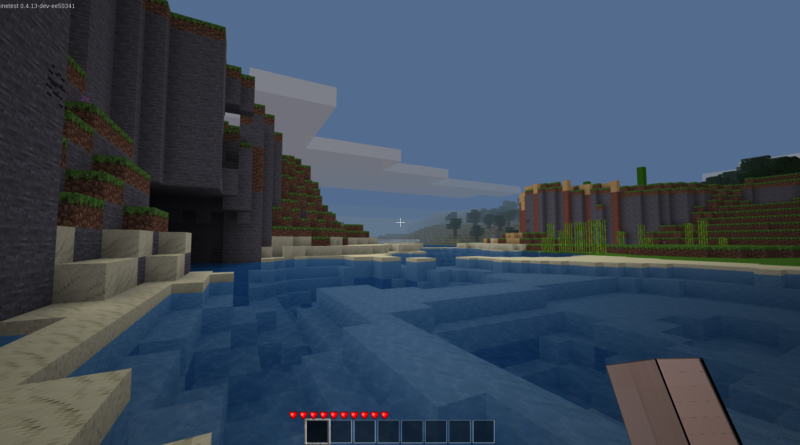
Cover Image: Dawn over a Minetest desert.
Voxelands (http://www.voxelands.com) is another great free (as in freedom and in beer) alternative, fork from Minetest. I’m surprised it hadn’t been mentioned.
I looked at Voxelands and Freeminer, another Minetest fork. I also looked a Terasology which has nothing to do with Minetest. I like and see the merits in all these projects. However, from an educational point of view, which is what I was aiming for, I think Minetest is the most useful in a classroom context.